


Easy installation. Fast transformations. Cost effectiveness. Endless customization of colors and patterns. If you’re a renter, when you’re ready to move on, you can break it down and take it with you.
No wonder composite deck tiles are an option high on many lists when people are looking to refresh an outdoor space, be it a faded patio, uninspired balcony or dated deck.
Understanding how to install deck tiles isn’t terribly complicated, but not knowing how to lay decking tiles can turn a quick home improvement project into fast-track frustration over wasted time and money.
Deck Tile Basics
Deck tiles are designed for easy installation on existing flat substructures. Such substructures include existing decks, patios, balconies, level gravel and compacted dirt.
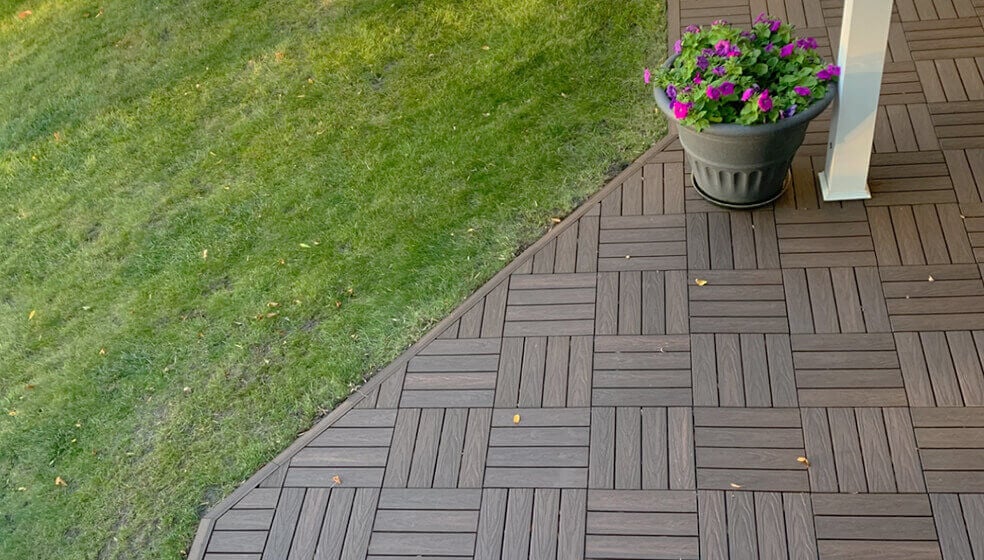
Typically, deck tiles incorporate composite or wood slats attached to a plastic lattice that serves as support and a system for locking the tiles to each other.
NewTechWood’s tiles come in three sizes: 1 square foot, 1 x 2 and 1 x 3, as well as single-slat versions of all those lengths. Our flexible locking system allows flush and offset attachment of tiles on all four sides. We also offer a variety of fascia, trim and stair nosing options to finish your project.
Realize Your Vision
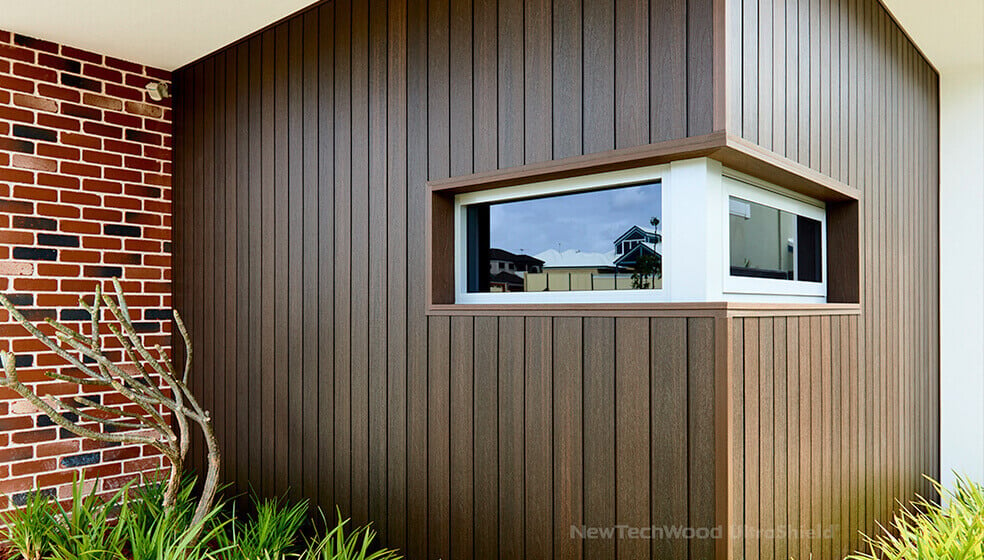
Aesthetically, composite deck tiles are adaptable enough to bring any look to life, from ultra-modern and minimal to rustic to quirky bohemian.
NewTechWood stocks 25 standard colors and can also create custom colors. We also have artificial grass tiles, which blend seamlessly to form lush artificial lawns that never need watering or mowing, and 1 x 1 stone tiles, both of which work with the deck tiles in any combination.
You can go for the monochromatic symmetry of one color and straight lines, mix things up with anything from a classic checkerboard pattern to joining tiles of different sizes, or combine decking, grass and stone for the maximum wow factor.
Once you’ve figured out your desired look, it’s time to make the plan and execute the vision.
Making it Happen
Installing a composite deck is a reasonably straightforward process. Breaking it down:
- Measure and order. Calculate the square footage you intend to cover. Include expansion gaps where necessary on the perimeter. Most installers recommend ordering 10% more flooring than what would be required to exactly cover your project area, allowing for cut tiles at the perimeter.
- Prepare your surface. It has to be level. For a lawn installation, that means removing grass and compacting soil or adding a leveler such as sand or gravel; for decks that means redriving loosened screws and replacing or repairing warped boards; for patios, a good sweeping or power washing should be all you need.
- Start snapping. Lay in the tiles, starting with a row that won’t require any cuts. Lay in as many full tiles as you can, then cut in the rest.
Work With a Pro
Though NewTechWood’s composite deck tiles are designed to be installed easily by virtually anyone, nothing is more important than consulting with a professional supplier before launching into your project. If you’re doing the job yourself, when you choose NewTechWood products you’ll get the benefit of our experience to help you avoid missteps along the way. And of course, you’ll end up with an installation that will give you years of beautiful, worry-free use.
Whether you’re choosing composite decking or composite deck tiles, contact NewTechWood today to learn about our products and the simple deck care required for years of enviable outdoor space.


